本文章介绍了自己用 Octopress 搭建 blog 的过程,其中查了好多资料,看了好多文章,也走了不少弯路。现在记录下来,方便后人学习,自己也做个备忘。废话不多说,开工!
###搭建 blog 时的本机环境:
OS X EI(10.11.1),
ruby 2.0.0p645 (2015-04-13 revision 50299)
###1 安装 Octopress
什么是 Octopress ?
Octopres s是一个基于Ruby的开源 Blogging Framework,从写 blog,到发布,你完全可以用Shell里面的命令搞定。这样,写起Blog来,会让技术控们觉得很有成就感……
安装 Octopress
$ git clone git://github.com/imathis/octopress.git octopress
$ cd octopress
修改 gem 的 source
$ gem sources --add https://ruby.taobao.org/ --remove https://rubygems.org/
$ gem sources -l
*** CURRENT SOURCES ***

https://ruby.taobao.org
# 请确保只有 ruby.taobao.org
安装依赖
$ gem install bundler
$ bundle install
###2 在 github 上创建仓库
#####2.1 到 github 上创建仓库
到 github 上创建一个 username.github.io 的repo,比如我的github名字为 zwgithub ,我就创建了一个名字为 zwgithub.github.io 的仓库。
#####2.2 完成 github 和 Octopress 的关联
执行下面的命令并依照提示完成 github 和 Octopress 的关联
$ rake setup_github_pages

//提示如下:
(For example, 'git@github.com:your_username/your_username.github.io.git)
       or 'https://github.com/your_username/your_username.github.io')
比如我的我就输入如下:
git@github.com:zwgithub/zwgithub.github.io.git
###3 创建配置
#####3.1 生成博客
$ rake generate
$ rake deploy
生成后 push 到 github 上
$ git add .
$ git commit -m 'create blog'
$ git push origin source
完成后等待几秒就能访问 http://username.github.io 看到自己的博客了。
当然,你也可以在 push 到 github 上之前先在本地预览一下,命令如下
$ rake preview
你可以在本地的浏览器里打开 localhost:4000 来预览生成的 blog 。
#####3.2 修改配置文件
配置文件路径为~/octopress/_config.yml,下面是主要的配置,摘自 Octopress 官网,更多的配置可去官网查看。
url:                # For rewriting urls for RSS, etc
title:              # Used in the header and title tags
subtitle:           # A description used in the header
author:             # Your name, for RSS, Copyright, Metadata
simple_search:      # Search engine for simple site search
description:        # A default meta description for your site
date_format:        # Format dates using Ruby's date strftime syntax
subscribe_rss:      # Url for your blog's feed, defauts to /atom.xml
subscribe_email:    # Url to subscribe by email (service required)
category_feeds:     # Enable per category RSS feeds (defaults to false in 2.1)
email:              # Email address for the RSS feed if you want it.
#####3.3 安装第三方主题
如果你喜欢上面的默认的主题,这里的步骤就没必要执行了。本人比较 greyshade 主题,下面是安装步骤:
$ git clone git@github.com:shashankmehta/greyshade.git .themes/greyshade
$ echo "\$greyshade: color;" >> sass/custom/_colors.scss //Substitue 'color' with your highlight color
$ rake "install[greyshade]"
$ rake generate
到这一步,你的 blog 已经基本搭建完了,想要更完美的话,可以跳过第4步 开始写blog接着看第5步:让你的blog更完美 。
###4 开始写blog
哎呀,不容易,搭建了半天终于能写了。blog 是用 Markdown 语言来写的。Markdown 是一种可以使用普通文本编辑器编写的标记语言,通过简单的标记语法,它可以使普通文本内容具有一定的格式。在 mac 下可以使用 Mou 软件来写。
下面是写 blog 的命令。
$ rake new_post['title'] #title是你要写的 blog 的标题
//执行完上面的命令后会在 source/_posts 下面生成 xxx.markdown 文件。我们的 blog 就在这里面写。这个文件的名字是把时间和你刚才定义的 title连在一起的。
//例子:
//我刚才执行的命令为: rake new_post['用Octopress搭建属于自己的github博客'],那么就在 source/_posts 下面自动生成了 2016-04-09-yong-octopressda-jian-shu-yu-zi-ji-de-githubbo-ke.markdown 文件。我们的 blog 就用 Markdown 语言在 2016-04-09-yong-octopressda-jian-shu-yu-zi-ji-de-githubbo-ke.markdown 里面编写。


$ rake generate
$ rake preview
//在浏览器输入: localhost:4000 在本地先预览效果,满意后在 push 到 github。

$ git add .
$ git commit -m "comment"
$ git push origin source

$ rake deploy
###5 让你的blog更完美
用 greyshade 主题后,发现自己的 blog 效果和我们看到的大神的 blog 效果不太一样,这时候如果想达到这种效果,就需要优化一下了。
#####5.1 设置头像
把 source/_includes/header.html 中的 包含 <image src 标签替换成下面的代码。
<div class="profilepic">
    <script src="{{ root_url }}/javascripts/md5.js"></script>
    <script type="text/javascript">
    document.write("<img alt='Profile Picture' src='/images/tx.jpg' style='width:160px;'/>");
    </script>
</div>
不要忘记 要在 source/images 目录下面放一张你想自定义的头像,并命名为 tx.jpg ,和你上面代码里对应的图片一样就行。
#####5.2 分类标签
编辑 source/_includes/navigation.html ,仿照Blog和Archives的写法增加一行如下:
<ul class="main">
    <li><a href="{{ root_url }}/">博客 Blog</a></li>
    <li><a href="{{ root_url }}/blog/archives">归档 Archives</a></li>
    <li><a href="{{ root_url }}/about">关于 About</a></li>
</ul>
然后在命令行下执行
$ rake new_page['about']
这个会在 source\about 路径下生成 index.markdown ,跟上面的写 blog 方式一样,编辑index.markdown文件成自己想要的样式,重新部署,就能看到刚才新建的分类标签了。
#####5.3 评论功能
本人用的是 多说 的 ,注册 多说 账号,获取到它的公共代码,在Octopress的source/_includes/post目录下,新建一个文件,比如duoshuo.html 其代码如下:
<!-- 多说评论框 start -->
<div class="ds-thread" data-thread-key="{{ page.id }}" data-title="{{ page.title }}" data-url="{{site.url}}{{ page.url  }}"></div>
<!-- 多说评论框 end -->
<!-- 多说公共JS代码 start (一个网页只需插入一次) -->
<script type="text/javascript">
var duoshuoQuery = {short_name:"your_short_name"};
(function() {

    var ds = document.createElement('script');
    ds.type = 'text/javascript';ds.async = true;
    ds.src = (document.location.protocol == 'https:' ? 'https:' : 'http:') + '//static.duoshuo.com/embed.js';
    ds.charset = 'UTF-8';
    (document.getElementsByTagName('head')[0]
     || document.getElementsByTagName('body')[0]).appendChild(ds);
 })();
 </script>
 <!-- 多说公共JS代码 end -->
注意,请修改上面代码中的 short_name,这个值要去 多说 的后台去找。
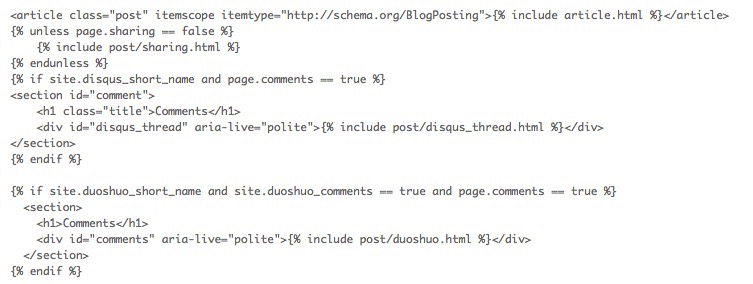
将上面的文件嵌入到source/_layouts/post.html下,可参考下列代码。
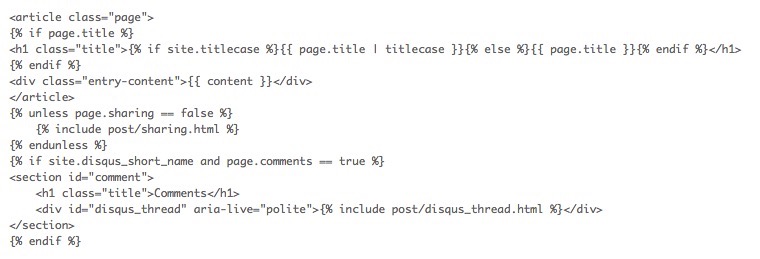
同样,将文件嵌入到source/_layouts/page.html里面
重新部署后就能看到有评论功能了,评论的管理都在多说的后台。
#####5.4 title 和 subtitle 不显示问题
修改 source/_includes/custom/header.html 里的文件如下,重新部署后便可以起总用。
<hgroup>
<h1><a class="link" href="{{ root_url }}/">{{ site.title }}</a></h1>
{% if site.subtitle %}
         {{ site.subtitle }}
    {% endif %}
#####5.5 使首页的文章以摘要的形式展示
- 在文章对应的markdown文件中,在需要显示在首页的文字后面添加<!—more—>,执行rake generate后在首页上会看到只显示<!—more—>前面的文字,文字后面会显示Read on链接,点击后进入文字的详细页面;
如果想将Read on 修改为中文,可以修改_config.yml文件
excerpt_link: "阅读全文 ->;" # "Continue reading" link text at the bottom of excerpted articles
###6 折腾后的收获
在执行 gem install bundler的时候,一会儿切换源,一会说 ruby 版本不对。看来是对 gem 不熟悉。那什么是RubyGems?
RubyGems是一个方便而强大的Ruby程序包管理器,Ruby的第三方插件是用gem方式来管理,非常容易发布和共享,一个简单的命令就可以安装上第三方的扩展库。特点:能远程安装包,包之间依赖关系的管理,简单可靠的卸载,查询机制,能查询本地和远程服务器的包信息,能保持一个包的不同版本,基于Web的查看接口,能查看你安装的gem的信息。Ruby1.9.1 以后的版本自带RubyGems。要切换 ruby 版本用什么好呢?笔者刚开始用了 rvm, 后来又用了 rbenv。安装的时候又用到了 homebrew。本着 ‘生命不息,折腾不止’的精神,重新的学习了以上各命令的用法。常用方法如下:
rvm常用命令
rvm remove ruby-1.8.7 --docs —gems     #删除某个版本的ruby,并且把文档和gems都删除
rvm use ruby-1.8.7 --default     #选择版本
rvm info     #查询当前版本
rvm list     #列出版本
rvm implode     #删除rvm命令
rbenv常用命令
rbenv install --list  #列出所有可以安装的Ruby版本
rbenv install version     #version是具体要安装的版本,在上面列出的可以安装的目录中选择一个
rbenv versions     #查看本地安装的ruby版本
rbenv global version     #设置全局使用的ruby版本
rbenv shell version     #设置在当前shell中使用的ruby版本,生成了一个RBENV_VERSION的变量
rbenv local version      #设置在当前目录中的ruby版本,会在当前目录下生成.rbenv-version文件。
rbenv uninstall 2.00     #卸载指定ruby版本
rbenv rehash     #每当安装新的 Ruby 版本,或 gem 都要运行一下,不然有可能会出现新安装的不起作用的现象
Homebrew常用命令
brew uninstall rbenv     #卸载rbenv
brew list     #列出已安装的软件
brew update     #更新brew
brew home     #用浏览器打开brew的官方网站
brew info     #显示软件信息
brew deps     # 显示包依赖
###附录 参考链接:
http://www.xiaozhou.net/introduction_of_octopress-2012-07-25.html
http://octopress.org/docs/configuring Octopress 的配置
http://foggry.com/blog/2014/04/28/custom-your-octopress-blog 王中周的技术博客
https://github.com/shashankmehta/greyshade greyshade主题
https://ruby.taobao.org/ RubyGems镜像
https://github.com/Homebrew/legacy-homebrew homebrew
http://brew.sh/index_zh-cn.html brew 中文网页